Monday, January 11, 2016

Finger Painting is FUN!


Happy Monday everyone!

Do you remember what it was like to finger paint as a kid?

I remember how fun and free it was to stick my fingers in the pretty colors of paint set out for us by the teacher.

I can still feel the sensation of the cool & slick pigments on my fingers. 

The construction paper always felt rough at first when my fingertips spread the paint in lots of different shapes to form a picture.

When we are children, we do not judge what we do... we just do it and enjoy it as we do it!

That is what life is all about... enjoying the moment and appreciating the experience of whatever we are doing.

As we grow up, we lose some of that ease of just doing it to do it.  It always has to mean something or "be" something, and that pressure can kinda take the fun out of what we are doing.

So when I saw a Finger Painting Class offered by my favorite "art teacher" :) Carla Sonheim, I could not wait to sign up! 


In this wonderful 3 lesson, mini class, we relearn how to smush paint around again and have FUN seeing what appears on the page!

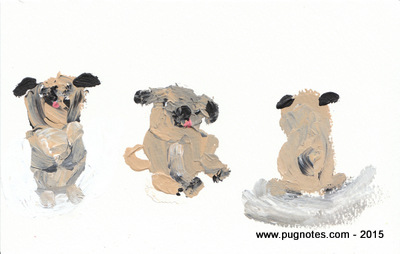
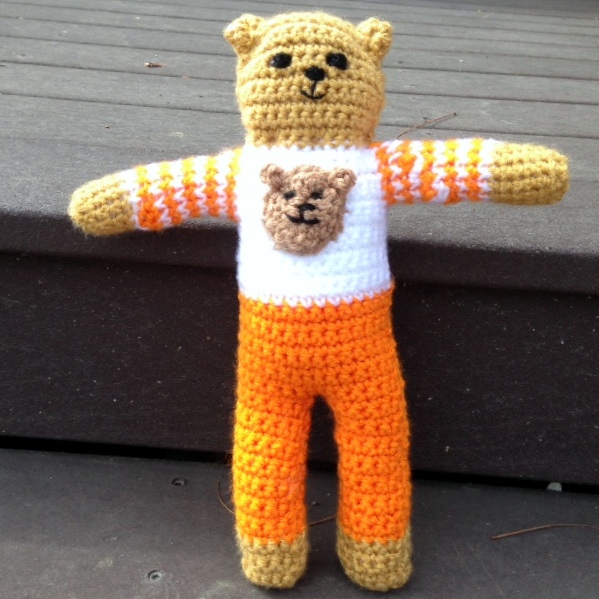
Here are the paintings I have made so far...


Three little Pugs all in a row!


A Bear


...and a Bunny!

They were so much fun to make and I cannot wait to see who else pops to life.


She is an amazing teacher!

It does not matter if you think you cannot draw or paint. :)

If you can scribble on a piece of paper, you are an artist!

She will teach you a whole toolbox of wonderful techniques and from the very first lesson... all of a sudden art appears!

It is relaxing, fun and exciting just to create!

I would love to see what you make!
Please feel free to share it with me!
I would love to see!

xoxoxo
Melissa & R-Chee

Sunday, January 03, 2016

Tunisian Crochet Wall Hanging ~ Fun with Fiber ~ New Year 2016 ~ New Artwork


Happy New Year everyone!

I just finished a new piece that I cannot wait to share with you!

It is my new wall hanging I made for my home.

This was a really FUN project that I enjoyed from start to finish.

I had no idea what I was creating when I started.

I just knew that I wanted to make a colorful, large piece for highly visible wall in my home.

I wanted it to have a rich feel and a thick fabric with a heavy fringe at the bottom.

Tunisian Crochet is a fun and easy technique that I learned in 2012.  It creates a thick wonderful fabric that looks like it has been knitted.

My favorite stitch is the Tunisian Simple Stitch (TSS).

Here are 2 blog posts that I found that have good tutorials on how to begin...


It is a very versatile stitch that I have also used to make several dolls, hats and neck gators over the years.


To make the fabric, I held two strands of yarn together.
I chose a worsted weight acrylic variegated yarn for the 1st strand that would be consistent through the whole piece.

The second strand of yarn changed throughout the whole piece as I used different wool and blended fiber yarns from my stash.  

I had no idea what it would look like when I started. 

I decided to make it in a series of panels so I could control how long and wide it would be without worrying about the weight & exact size of the piece as I worked on it.

It gave me a lot of flexibility with the end result & kept it very portable so I could work on it wherever I was!


Each panel is unique and has its own subtle color changes.

If I made this in one huge piece, the color changes would not have been as interesting because the flow would have been uniform from left to right instead of top to bottom.

When I finished all of the panels I lay them all out and turned them this way and that to find the color flow I liked across the piece.

It was an exciting process to see it come together from 5 individual pieces into one cohesive large tapestry.


Once they were placed in the order I liked, I turned them over wrong side up and sewed them together with my yarn needle & more long scraps of yarn from my stash.

Happily, another neat effect that happened by making them in panels is that the seams of each joined panel created a divided texture and drape that added a lot of character to the whole piece and prevented it from looking like a blanket hanging on the wall.

The next step was to crochet a border of burgundy around the whole piece.  I used a bulky weight yarn and I single crocheted 2 or 3 rows to get the size border I liked.


Then I cut lots of bulky and worsted weight fibers from my stash in the same color pallet to create the fringe.

An easy way to get them to be all the same size is to choose a book or piece of cardboard that is the length of the fringe you want to create.

Wind the fiber around the book over and over and cut across the fibers at the top of the backing you choose.

You will have a pile of fibers that are double the length of your fringe.

Grab as many fibers you want in each tassel and fold them half.

Place your crochet hook where want to place the tassel, put the group of yarn on the hook, bring the ends through the loop and adjust the tension you like for your knot. 

Repeat this process all the way across.  Because of the thickness of the fringe I wanted to create, I made each yarn bundle bulky and placed them in every other chain at the bottom of the border.  

When it was all done I added individual colors of worsted weight fibers randomly along the fringe line too to have color pops along the way.

For a visual explanation, check out this tutorial of a pom pom wall hanging that also has photos at the end of the post to show you what I described above.


Ta Da!

R-Chee was by my side through the whole project.
Can you see his little pug feet sticking out under the table? :)


The Wall Hanging is about 48 x 60 and weighs about 10 lbs.

The weight and size of the wall hanging could have made the installation challenging.

I did not want it to sag or stretch when I mounted it so my solution was to create an illusion of it hanging from delicate rings while actually providing structure along the top.

The wall hanging is hung on its own like a picture. 

I crocheted a sleeve across the top back portion and slid a long piece of wood in it to hang it from. Then I used two sawtooth hangers in the wood to hang the wall hanging on the wall.

The rings at the top are wood drapery rings that are floating above the actual piece. They are just turned flat instead of used as rings on a rod to hang a curtain. I actually took the hanging clips off the rings and just hung each one right up to the top edge of the piece.

Voila!

I just LOVE how it turned out!

What a FUN way to start 2016!

I cannot wait to see what else comes to life for all of us in the coming year.

Thank you so much for always playing with me and Archie!

You all make this journey a wonderful and exciting place to explore together!

xoxoxo
Melissa & Archie

Thursday, December 03, 2015

A Mother Bear Sighting December 2015 in Botswana!


Happy Thankful Thursday everyone!

R-Chee & I are so excited that our Mother Bears that we made for The Mother Bear Project in May have been spotted in Botswana with their new forever friends!


Aren't they cute?!

They all look so happy together! :)


R-Chee & I loved making them for them!

Each bear we make is special!

We have so much FUN crocheting each stitch and thinking about who they will hug when they arrive!


R-Chee sends each one off with a hug and a kiss from us!


If you would like to knit, crochet or help the Mother Bear Project in lots of different ways...

Please visit their website today!

They would always love to welcome you into their Mother Bear Family!

xoxoxo
Melissa and R-Chee


Tuesday, November 03, 2015

New Star Trek Sweater Vests & matching Bummlies!


Happy Tuesday everyone!

Noodles says "Live Long & Prosper" in her new Star Trek Sweater Vest and matching Bear Bummlie ~ Spock today! 

They are exploring Space The Final Frontier together!

You can meet and adopt you favorite Bummlie and matching Sweater Vest in my Etsy shop too!


Have a super day everyone!

Melissa & R-Chee

Monday, November 02, 2015

Learn how to create Dog Portrait Collages in a wonderful NEW BOOK! ~ DIY Dog Portraits


Happy Monday everyone!

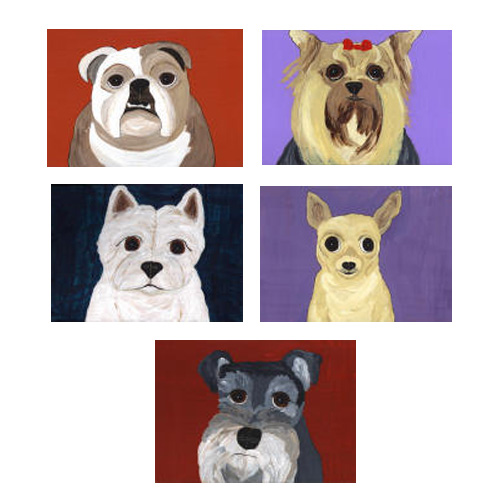
I am so excited & honored to share that my Bulldog collage is included in the Inspiration Gallery section of a new book ~ DIY Dog Portraits. Creating collages is fun, easy & relaxing for kids of ALL ages!

Come & Play with us today!


The book is  Now available on Amazon. 

You can also purchase my Bulldog collage as note cards or a signed print in my etsy shop...


How FUN!

R-Chee & I are honored to be included in this wonderful book that shows you with 8 DIY projects how to create collages of your favorite pets right at your kitchen table!

xoxoxo
Melissa & R-Chee


Friday, October 23, 2015

Introducing The Smashing Pugs & their Bummlies!


Happy Friday everyone! 


R-Chee & I are smiling from ear to ear because our friends, Tweedles & Lucky look simply smashing in their new Sweater Vests while playing in the leaves with their Bummlies!


Bear Bummlie ~ Maple and Pug Bummlie ~ Stella love to play in the leaves!

Put your right foot in...
Put your right foot out...
Put your BUM right in and shake it all about! :)


 You can order your very own Sweater vests and Bummlies too in my Etsy Shop ~ http://pugnotes.etsy.com

Thank you so much Georgie W. in OR & Kathy W. in CT for sharing your photos with us! 

Lucky's photo was taken by the very talented pet photographer, Joline Richard of http://www.twopugsstudio.com/. Joline is an amazing artist who shares her photography with all of us as well as with the special rescue pugs of PRONE like Lucky who are looking for their forever homes!

xoxoxox
Melissa & R-Chee

Thursday, October 15, 2015

New Star Trek Bummlies are Here!


Live Long & Prosper!

Happy Thursday everyone!  

R-Chee & I are sooo excited to introduce our NEW Star Trek Bummlies!  

Meet Scotty, Captain Kirk & Spock! 

They are now available in my Etsy Shop!   

You are the 1st to see!  

Your pup will feel warm & happy this season snuggled in a cozy Pug Notes' Star Trek Sweater Vest hugging his or her very own Star Trek Bummlie!

NEW matching Bummlies & Sweater Vests are now in the shop! 

Now you can have FUN putting together your favorite pairs! 


Wednesday, October 14, 2015

The Pug Notes Fall 2015 Newsletter is Here!


Happy Wednesday everyone!

R-Chee & I are so excited to share our Pug Notes 2015 Fall Newsletter with you!

Please contact us anytime if you would like our Pug Notes Quarterly Newsletter to arrive  directly in your inbox 4x a year!  

It is filled with Good News, New Art and Products & A Bummlie Giveaway for you to enjoy! 

xoxoxo
Melissa & R-Chee

Thursday, October 08, 2015

Exciting News ~ The Pug Notes Amazon Handmade Shop is LIVE!


Happy Thursday everyone!

Exciting News!


Pug Notes Amazon Handmade shop is officially open today!

You are the 1st to see! smile emoticon 

You will find lots of FUN Pug Notes Art to enjoy!


Archie & I are excited to be one of the first shops to be a part of Amazon Handmade and cannot wait to grow with them as they begin this exciting journey!


Please stop by and let us know what you think!

xoxoxo
Melissa and R-Chee